Sticking it to the Man!

Well the weather man to be more accurate!

One thing that has always made me chuckle is the mystic art of weather forecasting. Despite huge super computers, satellites, weather stations and a whole host of other data sources mankind doesn’t seem to be able to get it right.

Take Michael Fish’s all time classic of October 1987!

I’m sure if they rolled a dice or span a wheel the forecast would come out the same!

Now it’s all well and good having a rebellious opinion but how about doing something about it? OK, let’s have a go and see what we can do.

As a kid I remember doing a school project where you had to collect weather data for a week and then produce little graphs and charts of your observations. My dad duly fashioned a weather vane out of some bits of wood and it balanced on an upturned nail to swing freely in the breeze, a rain collector fashioned out of a plastic Coke bottle buried in the ground, thermometer and mark one eyeballs to note the cloud formations. All good educational fun!

Fast forwarding 40 years and it seemed a good plan to update that principle of data collection and see what the modern environment can do with it. I like the whole concept of crowd data when it comes to meteorological matters (not so keen on other data harvesting especially when you don’t know it’s happening as the real posters ain’t this obvious believe me!)

I’ve been tempted on several occasions to buy and install an AccuWeather compatible weather station to throw my contribution into the mix. They’re not cheap which has been the main dissuader!

Added to that in Ham Radio land weather report exchanges regularly form part of contacts and an eye on all things meteorological goes very much with the territory.

So with all that in mind, while slumped in a deck chair between sinking fence posts into the ground I was pursuing the internet on my phone and stumbled across a very neat project on Instructables.com

To be honest I was drawn to the very neat little 3D printed enclosure that the designer had fashioned

more than anything else but the more I read the more intrigued I became and thought, why not?

Reading the article in full I realised I had 90% of the components already as my box of Arduino bits has a multitude of sensors and the like that have been bought and used in other test projects or just harvested at minimal cost for a rainy day project (I know, I know!)

The evolution of the original project saw it grow into a PCB based build in version 2. Nothing against breadboard or strip board but I like a professional looking build. The added value of the PCB solution is the fact that if you use the include link in his post you get a voucher from PCBWay which negates the board cost in full, all you pay is postage and you get a very nice professionally manufactured board in return. In addition the author gets a kickback from the company which is nice as he has invested time and effort into this project and to tip him $10 for his contribution to the greater good of intellectual advancement and creativity isn’t a bad thing.

Not wishing to see him off but I’ve got a stack of the board’s left over as there’s a minimum quantity on the order. As such, as a first come first serve offer to my readers, if you’d like one, if you cover your postage costs I’ll send you one. Just drop me an email via the contacts page. When they’re gone, they’re gone.

I’m not going to do a whole blow by blow build shoot for this as time is tight but basically you take all of this, plus a few sensors and so on


And get this rather nifty, compact motherboard with all the daughter PCBs duly installed and ready to go.

This is an independent, self powering system which uses a solar panel to recharge a Li-Ion cell mounted on the board. Even on an overcast day enough UV is being harvested to maintain the battery which is quite impressive.

Now when it comes to the enclosure, despite the natty first iteration, it’s lacking on the weatherproofing front plus the external influences on the sensors due to its limited shielding means the harvested data won’t be as true as it could be.

Enter case version 2.0!


A full blown Stevenson Screen and printed with the trusty Prusa i3 MK3S. It took almost a week to print due to the complexity, well I say that, the multiple rings which are needed to build the vented housing. I really like it and it is both substantial and durable.

The project is another Internet of Things (IoT) concept and the data is being passed back to my home network over Wi-Fi where it disappears into the ether to be served up via Blynk or ThingSpeak. What you have is a home made data logger which is a bit of fun and can give you a what’s happening now snapshot in the weather department at your location.

How about stepping it up a bit and becoming a meteorological soothsayer? The code from this GitHub repository attempts this using the Zambretti Forecaster

So after running the weather station for several weeks what do I think?

There’s still a bit of fine tuning to be done. The battery needs it’s calibration factor adjusting within the sketch to give a true voltage and I need to thoroughly weatherproof the PCB with a conformal coating before I trust this little box of tricks to a permanent place in the garden, but overall I’m really please with this project.

Homebrew 1 – 0 The Met Office!

Still here!

It’s been a good twelve months since I posted anything and not surprisingly some of you have wondered if I’m still in the game or even still alive!

Thank you to those of you who have dropped me an email via the contact page asking for advice or just saying thank you for the blog posts I’ve made. It’s genuinely appreciated that my missives are of use to you in whatever shape or form.

Yup, I’m still here folks just massively busy having moved house as I’m contending with the inevitable string of “issues” that comes with new home ownership. When I say new, I’m talking a 1950’s pile which is made of materials that happily blunt your drill bits after drilling no more than 6 holes in the walls, not this modern plasterboard stuff!  Scale that up to the number of shelves in the man cave/shack along with the rest of the place and quite rapidly I’m wishing I had shares in a tungsten carbide tip drill bit making factory!

I’m tantalisingly close to being able to set my rig up again but at the minute there are still a few major house projects underway that have got to take priority and are consuming all my available time and resources.

That said I’m not resting on my laurels and there are still a few fun mini-projects underway as a distraction while I wait for concrete to dry (literally!)

One minor addition to my equipment/toy stash is one of these

Yep the Prusa i3 Mk3 3D printer. A very useful and fun device it is too especially if you buy it in kit form (as I did) and build it yourself! Alright, I will admit to having fallen into the trap of having printed a few completely useless things just for fun

but having a bit of fun never killed anyone did it? Meet my cynical squid, his face says it all!

When it comes to slightly more productive matters it’s very useful to be able to custom print plastics as one of my biggest bugbears is finding a suitable enclosure for a project. As much as I love metalworking and being creative, to be able to produce a bespoke professionally finished item just gives things that polished feel.

Case in point –

This is a rack mount fixing for a Raspberry Pi so it can sit in my rack that contains my servers, router, switch etc.

The problem is in my new residence the equipment rack is in the loft. Perfect dead space to place equipment. It’s dry, clean, dust free (as I boarded the whole lot out) and secure plus the cable infrastructure to the house is easy to accommodate by dropping Cat6 cable down inside pre-existing conduits that carry other services where the house has been rewired and the central heating reworked by the previous owner.

The only snag is there’s no airflow in that loft space which has required a man in the know to come and have a look, suck his teeth and agree that there needs to be air movement in there or you open up a can of veritable baked worms! Add to that, if it’s massively hot IT equipment can start getting upset. The solution has been the installation of venting roof tiles towards the ridge line and down towards the soffits. Convection then does it’s thing, with the hot air escaping at the ridge, cooler air being drawn it at the soffit level, we have airflow and the condensation and potential damp issues are then removed.

The rub is a loft can still get hot and with the summer doing it’s thing, it’s proving the point nicely. My concern is overheating kit in the rack leading to device failure, data loss, expense and tears! The solution to this is to have the Raspberry Pi sat in the rack with a small RTC (real time clock) module sat on the GPIO header. Along with the RTC that module has a sensor on board which can accurately sense the ambient temperature. When the temperature rises to a risk level, a warning email is sent to make me aware plus the plan is that this tiny PC also sends a graceful shutdown command to the machines in the rack causing them to power down nicely. I’d rather be without them but knowing they are safe rather than frying them!

As such you can’t put the Raspberry Pi in a box otherwise you’re not sensing the correct temperature, it needs to be open to the elements, hence the 3D printed rack mount tray or skid in bright orange.

Total print time about an hour and cost in PLA is pence! OK the capital cost investment in the printer could be argued as a major negative but the uses I’ve found for it so far (including printing replacement plastic parts for my car!) have far outweighed that in my opinion. There are a few modifications and upgrades awaiting the Prusa which will be for the winter months but in the meantime I’ve got a fence to finish building while the sun is shining!

QRP Labs 5W CW transciever kit #7

OK I’ll be the first to admit that I’m the worlds worst at finishing projects. The number of “almost completed” things I posses is ridiculous and the whole thing is starting to bite me in the arse a bit. I’m rapidly discovering that projects not in enclosures don’t tend to travel well and as I’m still living out of boxes and rapidly creating more cubic containers of possessions I thought it only right to at least finish this one off properly before my tools and workshop are consigned to storage!

I’m keen to use this rig in WSPR mode and for that I purchased the GPS unit offered by QRP Labs. Assembly of that was very straight forward.

The next trick was to provide my receiver with a suitable enclosure. Having learnt the hard way with my WSPR beacon, I wanted this to be slightly more durable as the number of times I snapped the wires between the main unit and the receiver puck were getting to be ridiculous. One of my pet hates is trying to solder multicore cable to plugs so this time I spent a whole £1-99 and purchased a pre-assembled cable which was screened along its entire length, with very nice moulded plugs on each and just lopped one off to solder it to the receiver board. One thing QRP labs advise is not to use a metal enclosure for the receiver so the hard part was trying to find a plastic one which had a degree of transparency to it so the status LED’s were still visible. I’ve used Hammond enclosures before but they were daft money so I plumped for a cheap and cheerful one from eBay, correct dimensions etc etc, lovely stuff.

Until the bloody thing arrived and the internal dimensions were 2mm too small to accommodate the PCB without a liberal application of my Dremel. Anything for an easy life please!!

At the risk of going all style over substance it seemed rude not to give my suitably hacked about enclosure a bit of corporate colouring to match my transceiver. Also it was an excuse to patch the chip on that which had been nagging me since the day  I finished it. Now time is of the essence here as the Met Office, local radio, Accuweather and the old man down the road are warning of a cold snap which the makers of “The Day After Tomorrow” would be proud of! Not the sort of weather to attempt any type of outdoor work let alone spray painting. So with the end of the world looming I made haste and hit my little plastic box with some Ford Vista Phoenix Orange and used the veritable hot house which is my dining room this afternoon as a slow bake oven.

The fact my cat is developing a tan laying on the table next to it is an indication of the warmth in there! It’s glorious.

So with everything all nicely painted it was a simple case of putting everything back together.

And there we go, what a lovely couple they make!

So as we’ve all been sent home from school today on the off chance there may be a snowflake sighted somewhere, it’d be rude not to see what this thing can do. What else am I going to do? Scrape the snow off the car?

https://www.dropbox.com/s/4daabv6lpnrxnne/VID-20180301-WA0001.mp4?dl=0

And on that note, until next time!

QRP Labs 5W CW transciever kit #6

When the weather broke and it decided to be slightly less like a water park and more like Spring I pounced. Seizing the moment I cracked on with my enclosure and took the opportunity to spray my drive, hands and enclosure Ford Vista Phoenix Orange.

I’ve seen a few enclosures made from PCB material in similar colours and really liked it, so as a build taking inspiration from both options I plumped for it. The whole idea of these colour schemes is so that when you’re out in the wilds being /P you don’t accidentally leave your nice tactical black rig laying around and wander off without it. In short, idiot proofing! Four coats later and my can spluttered and gave out, job done. After 24 hours of allowing the paint job to dry gently indoors in the warmth we have this.

At the same time I ran my case decal through my inkjet printer on water slide decal paper and hit it with three layers of spray varnish before giving it 24 hours to cure.

So the next trick was to add the decal sheet to the case

To be honest I’m really pleased with how things are looking but there’s a really good reason why inkjet print jobs and water don’t mix. Despite three decent layers of varnish to seal the ink against the media I suffered a degree of print bleed when the transfer sheet hit the water and when dabbing down after application. As such the finished article isn’t as sharp as it could be but I’m hoping it won’t be that noticeable. I joked earlier about investing in a laser printer and I’m now serious about doing so. The print process is different to inkjet and as such you get a much sharper print, the ink coverage is uniform and deeper (in my opinion) and for this type of application with the correct media you’re not going to suffer leaching. Also for day to day correspondence it gives a much more professional output. In reality something like an HP LaserJet Pro for just over £200 isn’t a bad buy and with all of the connectivity options it supports it’s moving up the list from “would be nice” towards “ought to sort sooner rather than later”. Add to that that inkjet ink is the 8th most expensive liquid on the planet, it’s time to find a different way to spend £80 rather than on refill packs.

Moving on, a 24 hour drying period is needed before I hit the enclosure with a lacquer layer to seal the decal sheet and to protect my paint job.

So with the enclosure completed it was time to package everything up, but before doing so I wanted to prevent anything nasty happening with the rig. One thing that was noted and commented on is that if you use the rig for WSPR (which I do) the duty cycle (time the radio is in effect keyed down and transmitting) of the transmission is 2 minutes from start to end. Even with the power amplifier in the circuit being Class E and very efficient, there’s no such thing as a free lunch and the power transistors tend to get on the hotter side of warm. The suggestion is to add some form of heat sink to them, which is interesting as you haven’t got an awful lot of room to play with!

Now you can get commercial heatsinks for TO-92 packages but they’re not cheap and they require space around them to attach.

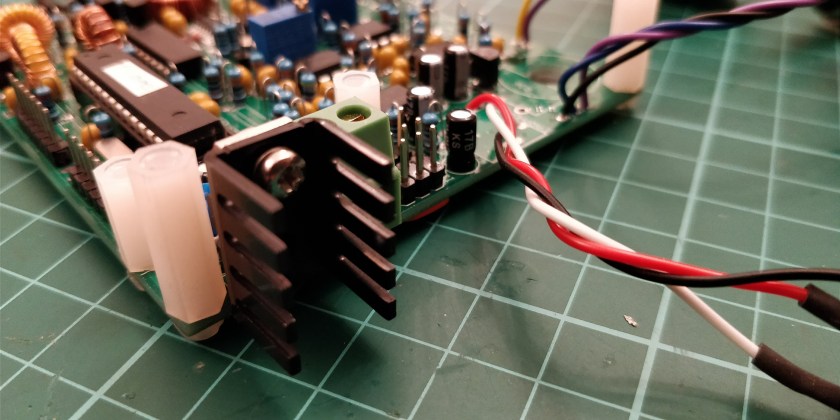
You can see that the one of the left is incredibly close to the stand off spacer for the LCD display which makes things a little tight to say the least!

A bit of Google work revealed several nifty DIY solutions, one from instructables and one from Matt’s Tech Pages, which is truly inspired and uses a 6mm ring terminal to do the job.

The snag is I just didn’t have enough space so it was time to improvise. Take one strip of heatsink, attack with a Dremel and you get something like this.

Apply a small amount of Arctic Silver thermal grease and a small ring of heatshrink tubing and you get this.

Objective achieved with no impact on neighbouring components. OK it’s not the biggest heatsink in the world but some heatsink is better than no heatsink, especially if it prevents transistors from burning out. I’m sure there would have been someway of bridging the transistors to the case chassis, bearing in mind its huge and made of metal it would have done the job nicely, but it would have been way too fiddly and there’s no guarantee that it would remain permanently attached.

For completeness I added a simple commercial one to the MOSFET to help keep things cool.

Job done! Next trick was to shoehorn everything into the enclosure. Only one broken wire and a minor dink to my paint job (which is nagging me believe me!) later and everything’s in place.

Check it still works before putting the case back on.

Add a few knobs for the rotary controls

And Roberts your mother’s brother!

I’m really pleased with the finished result and it’s been a fun build. Next trick is to get the QCX on a real antenna and see what the world has to offer it in the way of QSO’s and WSPR work.

QRP Labs 5W CW transciever kit #5

Now unlike Mick, who can work wonders with Serif Page Plus I struggle when it comes to playing with graphic packages. I use them so infrequently that I spend more time cursing and accidentally deleting what I’ve just done than producing anything worthy. I’m sure if I spent the time to learn one properly I would get some good results but then I wouldn’t need it. It’s like being confronted with the child who has homework where they have to produce a PowerPoint presentation and they promptly produce something that someone giving a TED lecture would be proud of. I’m from the era of acetate OHP slides. I like them, they work!

All that aside my designing was done in MS Word. I built a table of cells, moved things around where I needed them, added my little icons and lettering then hid all the cell outlines. To be honest I’m really pleased with the few hours work it took to create. The plan for me is to revisit the idea of inkjet water slide decals like I used on my 1 Watter to great success. Mick does a very neat trick of printing his decals on paper using a monochrome laser printer then securing them behind an acetate protective layer with mechanical fixings which works really well. If you have a look at the readers wives page at QRP labs gallery and scroll down and look for QCX-40 by Mick M0GWD you’ll see the quality of his work. Unfortunately, not having a laser printer (which is something I really need to sort) nor a Prusa i3 Mk 3, I need to work with what I’ve got so my plan is to apply decals to the paint layer once sprayed and then lacquer protect them to give a finished article.

That’s my layout, which I intend to print as a single piece this time. The snag I found with the 1 Watter was that lots of little decals got a bit fiddly. My concern here is one large one may well rip when moved around to get it into position plus I need to cut holes to accommodate the screws and control shafts from the pots, buttons and rotary encoder.

That’s version 6 of my decal as a paper print for sizing etc. It’s evolved again since last night and I’m sure it will again before it gets placed on the enclosure. This morning I trotted off to Halfords to get some more primer and a very nice satin finish lacquer. I’ve never been a fan of high gloss finishes, so we’ll give this rattle can a go.

Unfortunately, the great British weather has put a hold on things. My spray bay is a sheltered corner of my drive and today it’s damp and windy. Hardly the conditions for spraying paint and the likes. So until there’s a break in the weather which isn’t looking likely this week, everything’s on hold.

To be continued . . .

QRP Labs 5W CW transciever kit #4

So I’m into week three of Aussie Flu and I’m resembling a Wookie more than a human due to my facial hair. With the cough I’ve got there’s a definite intergalactic walking rug roar going on!

I must admit to starting to climb the walls slightly more than a little as I don’t do ill, but have tried to keep my brain occupied if nothing else by cracking on with my QCX kit. To be honest when I get back to work I won’t have the time so lets make hay while the sun shines.

We left the saga last time with me unable to find my capacitive touch key so I was unable to fully test the little rig. In the end I gave up and rather grudgingly lashed out on a Palm Radio Pico Paddle. I only say grudgingly because somewhere is a perfectly good home made paddle which I really like but I’m buggered if I can find it. The Pico Paddle is lovely and does the job nicely, so I eventually managed to hook the QCX up and give it a go.

The rig requires alignment and the manual walks you through the various calibration steps to set the radio up. It’s worth spending the time to do it properly and I wasted an afternoon playing.

One thing that a lot of people have commented on is that the radio needs to be housed inside a screened enclosure to prevent stray RF causing issues. That aside this thing needs to be portable as I’m sure there will be an FPARC show and tell when everyone is done and I wouldn’t want my hard work getting ruined in transit. For speed I “borrowed” an idea from Mick M0GWD from the club who is very talented when it comes to enclosures and graphics. He very kindly sent me a copy of his drilling pattern which gave me a starter for 10 but I’ve got a few changes of my own to implement along the way.

I’m using a Hammond 1590XX aluminium enclosure for this and the board and associated wiring fits nicely, or at least it should!

So with my template glued to the case with Pritt Stick it was time to start chain drilling out the LCD cut out. I took my time as the screen is the focal point of the unit and I wanted it perfect.

I revisited that cut out over and over with needle files in all sorts of light and with  a variety of T squares and set squares before I was happy.

Circular holes are slightly easier and for once, rather than using a smaller drill and expanding the holes with needle files I lashed out on some intermediate size drill bits for some of the connector and rotary control entries just to get it right first time. Trust me it’s worth it.

After a thorough clean in hot soapy water the raw metal enclosure was washed down with IPA to degrease and to remove any water residue. We could have gone naked but I decided that this QCX was going to be both loud and proud in the colour department so it needed priming and painting.

Typically, I ran out of primer in the last few applications and just as the daylight was going but I think it’s sufficient for government work! That can cure for 24 hours before I hit it with a colour layer or five!

Meanwhile I decided I was going to mod my QCX on the PCB as I was suffering the unreliable microcontroller start up issue that other builders had been experiencing and thought while I was wielding a  soldering iron I’d apply them all for completeness. This involved relocating one of the inductors (L5) supplied with the kit and adding a few resistors in key places on the underside of the PCB, not unlike in the K2 build.

With all of that done, the next stop was to add a GPS receiver to the kit. Apart from making the WSPR functionality of the kit so much easier, it also provides a reference source for calibrating the radio further.

This is QRP Labs QLG1 and I bought it at the same time as the QCX kit. If you use this rather than anything else its a simple 4 wire hook up to the rig and saves a lot of hassle. Now when I’ve tried to hook GPS antennas to kits before I’ve got into all sorts of trouble with broken wires in cables, at entry points and on plugs.

Not this time, I had a flash of inspiration and paid a whole £1-90 for someone to do all the hard work for me in the form of 3m S-Video cable from eBay. Nicely built and screened with moulded plugs it was a no brainer. I just lopped one plug off, worked out what went where inside and soldered it to my GPS puck.

Job done. I also invested in some decent quality chassis mount 4 pin mini DIN sockets and made myself a little jumpered connector to fit to my QCX board.

One screened durable GPS lead of the required length. All that’s needed is a nice little enclosure to mount the GPS unit in. I’m very tempted to 3D print one, just to justify buying a Prusa i3 Mk3 but may just wimp out with a plastic box from eBay – you never know.

Anyway, this is where we are so far –

All I need to do now is come up with a suitable decal pattern to finish off the enclosure once painted and we’re done.

Here’s a quick video of the rig in action now I’ve got it all working nicely.

https://www.dropbox.com/s/cs7tkv5iq9z95ei/QCX_test__20180122_224457.mp4?dl=0

To be continued . . .


QRP Labs 5W CW transciever kit #3

Day 8 of Aussie Flu. Reporting beard length 25 mm and increasing slowly, cough currently south by south west force 8 and productive, inter cranial pressure reduced by several millibars but still pounding, temperature 38 degrees, local bodily precipitation clammy. Outlook – bleak!

In between moments of grottiness I eventually finished the little QCX kit.

I made the decision early on that I was going to mount it in an enclosure so fashioned up fly leads for the switches and connectors to allow it to be boxed up. I’ve been umming and ahhing as to how to enclose the kit after having a look at QRP Labs builders gallery,  which you could consider as the equivalent of “readers wives for the Ham Radio enthusiast” in slight less salubrious circles!

Drawing inspiration from several candidates I’m going for a hybrid between two very well fashioned products. My enclosure has arrived and I need to get cutting and drilling.

Learning points on this one –

1/ Have a look at the suggest modifications page on the QRP Labs site. On initial power up my QCX did nothing and I wondered what was going on. It transpires that some people have seen issues with the software on the micro controller not starting on power up and there’s a mod to overcome the issue.

2/ The LCD has metal “fins” protruding from beneath which actually touch the top of one of the inductors which isn’t a good thing. Bend it out the way gently with pliers.

3/ The nylon pillars which fit close to the display contrast pot won’t fit on mine. I’ve got a very dodgy looking pot and the pillar needs filing down to allow it to fit. Easy enough to do, but without things would be under tension which isn’t a good idea.

4/ I was short changed on my nylon hardware in the kit which has meant an eBay job to get some spares

I’ve also got the GPS unit to build as I liked the idea of playing with WSPR again with this kit, so that needs building.

The real bummer I’ve found is that where I’ve been living out of packing crates for the last 13 months I can’t find my capacitive touch key anywhere. It added to the pile of frustration last night and I emptied countless boxes in the hope of finding it but to no avail. As such I’ve got no way of putting this little thing through its paces and getting it set up correctly. Another problem to be overcome.

To be continued . . .

QRP Labs 5W CW transceiver kit #2

So my creative constructive outburst was short lived when my little Australian friend reminded me who was running the shop this week by hitting me with a headache which felt like someone had parked a 7.5 tonne truck on my temples and threw in a raging temperature to boot. I lost a day and a half of my life to my bed and was eventually woken from my feverish slumber by my mog doing her best Simon’s Cat Cat-Man-Do impression.

To avoid being battered to within an inch of my life by my little furry friend I decided to try vertical again rather than horizontal. Two hours later I was bored witless and fired up my soldering iron in an attempt to relieve the tedium.

A few hours work and we’d made good progress. After an awful lot of resistors, came a few capacitors and things were starting to take shape.

Eventually I reached the band specific part of the build which involved winding the required inductors for the 40m model. I forgot how much I enjoyed making these things which is weird as they’re a fiddly as hell if you’ve got thick fingers.

I also realised I really do need to go to Specsavers and get some glasses that actually mean I can see what I’m doing! That’s for another day.

And that seemed a good point to call it a day. We’re getting there!

To be continued . . .

QRP Labs 5W CW transceiver kit – FPARC 2018 Club Construction Project #1

Last year I spent a lot of time looking rather than doing as I’m slightly preoccupied at the moment with other stuff which can technically termed as “shite”. Look it up, it’s a genuine term to describe life!

Whilst looking rather than doing, I stumbled across an advert for good old QRP Labs 5W CW transceiver kit and thought how it’d be really neat to build one when I got my life back on track. The kit is an embodiment of a lot of smaller projects I’ve played around with all rolled into one.

You know I’m a fan of their projects as one of my very first builds was their WSPR receiver which I still cherish to this day, even though it’s buried in a box in a storage unit at the minute. Being sensible/slightly distracted I shelved the idea of buying one until the good old boys from FPARC checked in to see if I was still alive and announced that the club 2018 construction project was going to be the 40m version of this. In true spirit I was inspired and promptly clicked “Add To Cart” and joined the lengthy queue awaiting delivery. That’s the problem with QRP Labs products, they’re so damn good they sell like hot cakes. Over the festive month my box from Japan landed and I was rewarded with kit number 2136! This was duly consigned to the pile of “things to look at sometime if I ever got the chance during the next 365 days”.

Now 2018 seems to be following in the fashion of 2017 where my luck is concerned and on Monday I had a visit from a friend from Australia. Unfortunately not a hot blonde Aussie Sheila in a Wicked Weasel bikini bursting forth from the swell carrying a 6 pack of Fosters like Ursula Andress in Dr. No, rather that slightly less popular chap H3N2. So much for the 8 quid I spent getting my arm stuck with a needle loaded with flu vaccine!

After coughing, spluttering and sleeping for 3 days I eventually dragged myself out of bed with the idea that being vertical and ill rather than horizontal and ill would be a better idea. Admittedly I currently look like Dracula on a bad day and am sporting a beard that Ant Middleton and his ex SF cohorts would be proud of but hey, who’s going to be looking at me?

Now I had options here. Watch countless box sets on telly, read or do something more practical, so I cracked open my Japan Post Parcel to see what was inside. Hey, it’s 2018 and this is a 2018 Construction Project!

You know, I started to get excited!! That’s therapy if ever there is one for flu. Now knowing that setting off on a build stood in a freezing cold garage wouldn’t do my health any good I decided to relocate my kit to the comfort of the warmth and the dining room table.

My house, my rules. It’s a brave new world out there! I must admit I felt slightly rusty when it came to sorting my act out when building things. It could have been a combination of all the Benylin and the flu or just I’m out of shape. After a while my Mojo was back where it needed to be and we had things under way.

After sorting and checking my kit contents it was time to put solder to iron and get building. As usual the manual is spot on in walking you through the build and I was feeling good.

The first few steps involve installing the various IC packages followed by capacitors. A lot of capacitors!

And that’s where we’re at before the shakes, shivers and headache started to rear its ugly head again. At least it’s a start and certainly more entertaining than the rubbish on Freeview!

To be continued . . .

I’m back!

Contrary to urban myth and legend I’m still alive! Admittedly this is not a full resumption of service, but things are lurching slowly towards normality. Until a whole world of other things are completed, pretty much everything RF is on hold.

That said, there’s no point in making a post just to say I’m doing nothing – that’d be silly!

How about a little bit of on the cheap asset protection using the Internet of Things (IoT) to do something useful, unlike a fridge that knows when you’re running low on milk and then gets Tesco’s to delivery you 4 pints of freshly squeezed cow that is 3 days out of date?

I like the whole world of Instructables.com and came across a very nifty little post that seemed an ideal way to ease myself back into things and at the same time do something that I need at the moment – keeping an eye on the things I own!

There are two articles for this natty little device, the first gets you up and running and the second refines it beautifully.

I sourced the required door alarm unit and WiFi module from eBay for next to nothing and duly waited 3-4 weeks for them to land, but hey who’s complaining?

The ESP8266 WiFi module is tiny and a real work of art. With a few wires in place we’re set to go.

I plumped for a USB-FTDI module to program the ESP8266 as I couldn’t find my Arduino stuff in all the chaos and boxes around me. Again, a couple of quid from eBay.

And with it all hooked together, off we go!

I cheated a bit and used my laptop to search for the ESP8266 when it booted as a WiFi access point and then changed the IP address to my home network range so I could see it on my desktop machine via the built in web server which provides access to the inner workings of the module.

A real low baller came in the form of IFTTT changing the Maker Channel to Webhooks, which does exactly the same thing but isn’t called Maker Channel. That’s the problem when you play with this stuff late at night rather than go to bed, your brain lets you down.

So after a bit of desktop playing I had everything running nicely although it was as slow as hell using the ESP8266 BASIC program. Time to enhance!

ClemRz’s second post uses an Arduino script to do a slicker job and it’s a neat piece of code. Top tip, make sure you are using the absolute latest version of the Arduino environment (1.8.3) as I kept getting weird compilation errors until I upgraded it.

It works a treat and is much faster than the original iteration!

Now the next trick was to give the ESP8266 a home. The little $2 door alarm, for what it is, isn’t that bad. It makes a hell of a racket when it’s activated and would probably be useful enough on a hotel room door for slightly less salubrious stays, say the Days Inn Hotel on the M20 in Kent. But all we’re doing here is nicking the housing and the reed switch in effect. With the piezo sounder and the autotransformer removed from the PCB there’s plenty of space for the ESP8266 to cuckoo. This is a silent alarm which is neat as it adds nicely to the element of surprise on intervention as anyone sticking their nose into places they shouldn’t, doesn’t know that you know that they’re there!

So with a few breaking of tracks and soldering of wires it’s all done. You can just see the LED on the ESP8266 glowing. I kept it despite the minor drain it will cause on battery life just so I knew it was alive.

And there we have it – all done. I weighs about an ounce, is no more than 3.5″ long and 1″ wide.

When activated you get a very rapid email to whatever you want to access your email from notifying you of which alarm has tripped, time, location and battery voltage. I’ve installed the IFTTT app on my phone and have left the notifications for the app running. As such when one of my IFTTT applets runs I get an even quicker popup notification from the app that somethings activated without having to read my email.

Now I’ve got device number one working perfectly I’ll get it a few brothers and sisters to keep it company and put the IoT to some proper work!