James May would be proud!

When I was a kid there was a metalwork teacher at school who was a bit weird by the intellectual standards of your average teenager. This weirdness was exacerbated by one of the “cool” teachers Dr Jim, regaling the 6th Form chemistry class with tales of how Mr Metalwork had bought himself a patch of land, was living in a caravan on site and was building himself a timber framed house. This guy’s skill was even greater in that he was having to build the tools to cut the timber to build the house. This included a bench saw driven by a car engine to convert his raw timber into beams and planks. Impressive!

Now that was wasted on me in those days as a spotty oik, but today as an avid fan of Grand Designs, Kevin McCloud would be handing out awards with honours for that effort!

Where’s this going you ask? Good point and we’ll made! I’ve taken great delight in building the tools to make and test stuff as my interest in this field has grown rather than buying commercial off the shelf kit. Before I started playing with radio, one morning I woke up and decided to build a Geiger Counter. You what? Yup, a dyed-in-the-wool rad counting Geiger Counter!

Why? Well I’ve always had an interest in that area of physics and following the Fukushima disaster in 2011 there was a massive drive to provide the residents in the immediate and outlying affected areas with the ability to easily monitor the background radiation levels. A public spirited project then ensued with hundreds of easy build kits being shipped to Japan to help. As the immediacy of the situation dwindled these kit’s became available to others and I decided to have a look. Living on the south coast right next door to the home of the Royal Navy it would be interesting to see what was out there that’d make you glow in the dark! Let’s face it, when the local council sent the kids home from school with letters informing parents that schools now held stocks of potassium iodide tablets “just in case there was an “incident” involving the Dock Yard”, you’d guess that you may get a click or two above average off a Geiger Counter. Let’s face it they don’t run warships on AA batteries or unleaded!

So here is my Geiger Counter, equipped with a GM tube from deepest darkest Russia. You’ve got to love the entrepreneurs of the ex-Sov Block countries. I bet it was boosted from some military warehouse!

20160430_090617

I can thoroughly recommend building one as a side project. If you want a go have a look here.

Now as part of this build I needed a reasonably accurate capacitance meter, so invested my money in one of these, from Roman Black.

20160430_090826

It is one of the most useful bits of kit I’ve got and was worth the investment over and above the budget end of the market floating around on eBay. I try to look after it! The image doesn’t really do it justice I’m afraid.

So, you can imagine my horror when yesterday, while building my 1 Watter it all of a sudden started billowing clouds of blue smoke which very rapidly turned black and acrid!

James May moment and then some -“Oh cock!”

In my enthusiasm I hadn’t cleared sufficient space on my bench and had dragged the capacitance meter over an unfurled roll of solder which had shorted out the battery terminals on the PCB. To be honest I never realised 9 volts could generate that much smoke!

Thankfully after some very tender care Mr Capacitance meter is back and working.

Morals of the story.

1/ don’t dis your teachers at school

2/ value what you build even if it may appear trivial in the grand scheme of things

3/ keep your work bench clear!

QSB-01 (qrp-tech synchronous buildathon) #3 – receiver build updated @ 26/04/16

Rather than loads of posts, this blog is going to be my notebook for the QSB-01 in a rolling style. Also, rather than bore you to death with a blow by blow account it is simply going to be the necessary photo or answers requested by Yoda (Chuck Adams K7QO) at the conclusion of each phase of the build, along with a few others where relevant.

For it to all make sense have the necessary QSB-01 web pages one and two to hand.

____________________________________________

Phase 9 – LPF Section

Commenced 12/04/16  Completed 26/04/16

It’s taken two weeks to insert 5 components! That’s what happens when servers go wrong!

Phase 9 assembly work

20160425_090132

Phase 9 testing

20160426_162403

Video file – Phase 9 testing of completed receiver section

https://www.dropbox.com/s/zrnvkta3eyp0bip/20160426_162406.mp4?dl=0

Unfortunately, on the day the band was closed with absolutely no QSO’s to test the receiver against which is a real shame.

Phase 9 completed

20160425_092020

20160425_091558

____________________________________________

Phase 8 – TR/BPF Section

Commenced 12/04/16  Completed 12/04/16

Phase 8 assembly work

20160412_085932

Phase 8 testing

20160412_092653

Phase 8 completed

20160412_092810

20160412_092828

____________________________________________

Phase 7 – Advanced Testing Addendum

The display unit as it stands is pretty good but would be vastly improved by calibrating it, as the supplier comments that it shows 100Hz error when checked against a 10MHz reference standard. There is a trimpot on the board which allows calibration but I don’t own a DDS Frequency Standard. Remember the old “How to Build an Atomic Clock” post? Yep, that rubidium standard would really come in handy now!

Now without anything like that readily available, in a flash of inspiration/desperation I remembered my Elecraft XG2 Receiver Test Oscillator that I had paid a stupid amount of money for (129€’s to be precise!) when I was setting up my SoftRock Ensemble.

xg2_800

So at 4.3€ or £3.34 per component it seemed silly not to see if it would do the trick as it provides 50uV and 1uV signals for 80m, 40m and 20m.

In short, it didn’t, which is a pain, but thankfully I’ve found someone with a 10Mhz frequency generator who will be able to loan me 5 minutes of their time at some point to calibrate things.

____________________________________________

Phase 7 – Impedance Matching Transformer T4 and Band Pass Filter

Commenced 06/04/16  Completed 06/04/16

Phase 7 assembly work

20160406_173046

T4 torroid transformer 4T:28T


20160406_180818

20160406_180808

Phase 7 Testing

20160406_180741

20160406_180727

Audio file – power up, no wire, 15cm wire @ L3, 15cm wire @ L3 adjustment showing two peak positions

https://www.dropbox.com/s/lqyt3czbj8ffg9x/Phase%207%20testing.m4a?dl=0

Phase 7 Advanced Testing

This required a separate build of a digital display unit. I went for the one plugged by Chuck at http://www.qrpguys.com/

20160406_181029

20160407_174428

20160407_174502

Having set my mind on a final enclosure and so forth building the display threw a spanner in the works as it’s a really cool addition. As such I built it so it could be enclosure mounted (trimmer pot and push button mounted on the rear rather than front for easy access once mounted).

20160407_174558

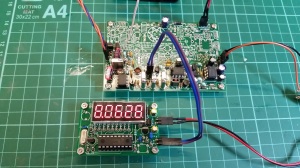
Once built the display is attached to the header at J7. I added a tuning pot at J1 to allow testing

20160407_190847

20160407_190857

My camera struggles under all the lighting on my bench to show the display with the clarity it provides in reality

20160407_191049

Video file – Phase 7 advanced testing with the display attached to the VXO

https://www.dropbox.com/s/qad5p4q5fz23zu9/20160407_190949.mp4?dl=0

Now the astute amongst you would have noticed that the display is saying 8.0628MHz. For 20M you’d be expecting something around 14MHz, which you get from mixing the VFO frequency with the IF (intermediate frequency) of the receiver. The display is taking its single input from the VFO, which is variable. The clever bit comes in that the display can be set to add or subtract the IF. In short you plumb the display to the IF at pin 7 of U5, power it up, hit the button on the unit and it saves it to memory. Now, when it is reattached to J1 it takes the value from memory and adds it to the input value giving you your desired frequency. It really is that simple!

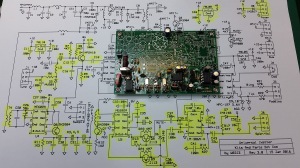
Phase 7 Completed
20160406_180924

20160406_180933

____________________________________________

Phase 6 – Variable Crystal Oscillator (VXO) Section Testing

Commenced 06/04/16  Completed 06/04/16

J1 Voltage = 9.94V

Audio file – 15cm wire placed at pins 1 and 2 of U4

https://www.dropbox.com/s/iger33dzx3jgvrs/Phase%206%20testing.m4a?dl=0

20160406_161423

20160406_161326

____________________________________________

Phase 5 – Variable Crystal Oscillator (VXO) Section

Commenced 05/04/16  Completed 06/04/16

Phase 5 assembly work

20160405_093515

20160405_093527

20160405_093527

20160405_093538

20160405_093544

20160405_173728

20160405_173701

Phase 5 Completed

20160406_161311

20160406_161402

____________________________________________

Phase 4 – IF Crystal Filter

Commenced 02/04/16  Completed 05/04/16

Phase 4 assembly work

20160405_084217

20160405_084225

20160405_085123

Phase 4 Testing

15cm wire placed at pins 1 and 2 of U4

https://www.dropbox.com/s/0qdegbd5tezkn53/Phase%204%20test.m4a?dl=0

Phase 4 Completed

20160405_085111

____________________________________________

Phase 3 – Audio Detector Mixer (BFO) Installation

Commenced 27/03/16  Completed 29/03/16

Phase 3 assembly work

20160327_154458

20160327_154515

Crystal testing

20160327_155334

Not all crystals are equal! Two showed fluctuation between 5.9993-5.9994MHz with some stability after running and warming up(?)

Winding T5 binocular toroid

Hardly blog worthy other than the instructions at Kitsandparts.com aren’t very clear and never having wound one of these before it was worth noting for future reference.

20160327_171638

In one hole and out the other constitutes ONE turn. As such if TWO turns are completed there will be TWO “wraps” of wire visible at one end of the toroid and ONE at the opposite end

20160327_171441

20160327_171718 (1)

20160327_171756

20160327_171906

20160327_172220

20160327_173133

Resource

Click to access calmont-eng-wire-gauge.pdf

The magnet wire in the kit isn’t marked and is supplied all in one bag! Now bearing in mind the difference between some of the gauges is fractions of millimeters a fair amount of time was spent checking and double checking with a set of digital calipers and then clearly labelling each to prevent any cock up!

Phase 3 Testing

On power up hiss heard BUT no difference in noise heard when 15cm wire touched on upper pad C32!

Phase 3 Advanced Testing

When a crystal oscillator with a 6MHz crystal is placed next to the 1Watter at this point in the build a distinct oscillating tone is heard.

The lack of any tone change being heard at basic testing was nagging so I sought advice from Chuck on this one.

His advice was to place the crystal oscillator away from the radio and then place the 15cm wire on the non grounded pad of C32.

With the oscillator 10″ from the board, with no wire nothing can be heard. With the wire touched against the pad the oscillator can be heard as clearly as when they are next to each other. Chuck’s advice, if you can hear that all is good! The suggestion is there’s insufficient electrical noise within the house to up the background noise, hence the lack of response at basic testing.

20160329_184054

Phase 3 complete

20160329_163322

20160329_163336

____________________________________________

Phase 2 – Commenced 27/03/16  Completed 27/03/16

Phase 2 Part 1 assembly work

20160327_142341

Phase 2 Part 1 assembly completed

20160327_141558

Reverse side of PCB

20160327_145122

Highlighted section of schematic reflects completed build on PCB

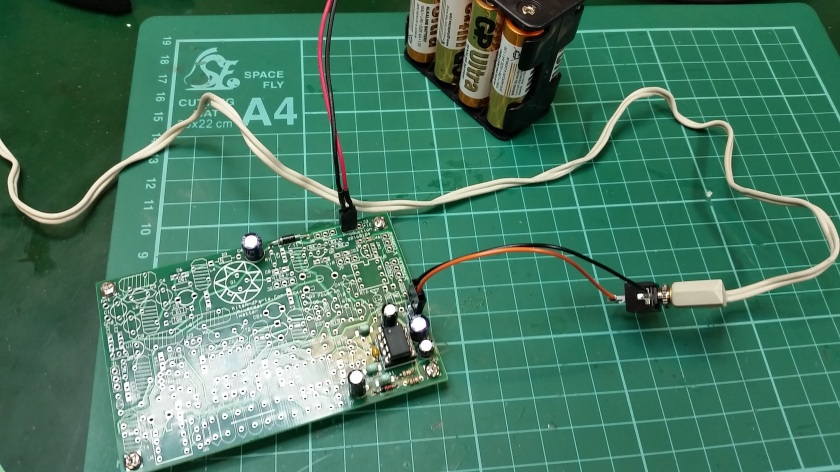
Phase 2 Part 1 Testing – A/C hum test at C37 & C38
20160327_143656

https://www.dropbox.com/s/omeo118p3vv7cgf/C37-C38%20AC%20hum.m4a?dl=0

Phase 2 Part 2 assembly work

20160327_152735

20160327_152748

20160327_152813

Phase 2 Part 2 Testing – A/C hum test at U5 pins 4 & 5

https://www.dropbox.com/s/w1sx0pslzv8qh4q/U5%20pin%204%20%26%205%20AC%20hum.m4a?dl=0

Phase 2 Part 2 Complete

20160327_153007

20160327_153019

____________________________________________

Phase 1 – Commenced 27/03/16  Completed 27/03/16

Homework Completed 

Workbench20160118_113817

Ordered & Delivered 1Watter 20m kit – S/N 60720160319_103320

Phase 1 Assembly work

20160327_120903

Phase 1 assembly completed – Jumper power connection to PCB & completed power supply section

20160327_121024

Reverse side of PCB showing solder connections and stand off spacer

20160327_120925

Highlighted section of schematic reflects completed build on PCB

Phase 1 Testing

20160327_120344

Voltage test at C7 top pad – 12.65V, battery voltage – 12.72V

20160327_120650

Reversed polarity voltage test

20160327_121437

Further voltage checks at U6-6

Battery = 12.72V, Voltage at C7 = 12.65V, Voltage at U6-6 = 12.66V

Enclosure considerations 

cu-2100

1/ BUD Industries aluminium enclosure available from Mouser – commercial option

Screenshot 2016-03-09 14.41.42

2/ QRPbuilders double sided PCB enclosure for 1 Watter – homebrew


Something new for the weekend Sir?

“Frustrated, sleepless nights, nervous tense moments? Plagued by permanent upgrades? You’re running a Microsoft Operating System!”

Yep, it comes to us all at some point but how many of us actually do anything about it?

In an attempt to inject something a little lighter into a Sunday afternoon and to motivate our sponsor to give something new a whirl, here we go.

By default there are countless millions of PC’s on the planet running some permutation of Microsoft’s operating system and as a result they get to make a lot of the rules, which unfortunately aren’t always in the best interest of the end user.

For the average Joe being able to turn on a computer and it work with all the familiar things being in the familiar places is all they want, but like everything that comes with a cost. People are up in arms at the thought of governments collecting personal information of the masses to keep us safe, but has anyone ever questioned multinational corporations doing exactly the same thing? Why should your computer usage statistics, browsing data, contact data, personal photos and geolocation data be sent back to corporations servers as part of the default setting? To improve the end user experience possibly but more honestly to bombard you with targeted marketing. There are possibly other slightly darker uses for your data and if it’s not for keeping you safe in your bed at night perhaps people ought to be a bit more savvy!

That aside I’m getting more and more hacked off with how the new iterations of Windows look to keep the user safe from the inner workings.

In the dim and distant past when you sat a computer you were greeted with a black screen and a prompt C:\

If you didn’t have a serious beard, glasses and the brain the size of a planet this was typically where your involvement with all things computing ceased. As things evolved nice graphical front ends appeared buffering the user from the nasty code which lurked beneath, but for those wishing to tweak and enhance what their computer is doing this move to a corporate computing front end can act as a real barrier, especially if your knowledge is above that of the average user but below that of a serious coder! There aren’t enough hours in the day to research how to get around Microsoft’s new baby, cock it up, go back to scratch and then get it right. Don’t get me wrong, that’s how you learn but there comes a point where until you have all the free time in the world you need a Plan B.

For a long time I’ve been a fan of the other computing options out there but have never made the leap of faith to the other side.

Now the plan here is an alternative desktop PC free from the constraints of Microsoft.

If we’re talking money Mac is the way to go. Here we have the Mac Mini.

Mac_mini_mid2010_back

Now what isn’t there to like about that? Exactly, but unfortunately these things hold their value. Usability gets a big thumbs up. Everyone can use an iPhone or iPad and these things give you that safety blanket element along with the ability to get at the inner workings of the Unix based operating system to tweak and adjust packages to suit.

We are going to end up with a Linux beast to replace the Microsoft ball and chain so how do we do this cheaper?

intel-nuc-core-i5-nuc5i5ryk-mini-pc-review-ram-1500x1000

The Intel NUC has been a consideration on previous occasions for other projects and they are really neat but they are barebone systems which require RAM and an SSD to get you up and running making them quite expensive little toys. There are other manufacturers out there such as Gigabyte BRIX, Zotac ZBOX and Asus Vivo but unfortunately the manufacturers have tended to tack their colours to the Microsoft mast and to a degree there are warnings of “There be dragons!” if you venture off piste with your operating system.

Enter the the Acer Revo

71iS5RSamQL._SL1500_

I must admit to having three of these things dotted around the house already. Two are dedicated media centre boxes sat beneath TV’s and one is a server. They’re small, self contained and an absolute steal on eBay second hand.

Here’s my new desktop PC in the flesh

20160417_093314

And to put things into perspective, my Windows PC is sat beneath the desk on the floor!

20160417_154153

Now I can hear people say it hasn’t got a CD drive. So what? There’s a large move away from tangible media and if you really need one plug an external drive in.

It comes with all your usual connections, media card slot, HDMI connectors so you plug it straight into a telly, USB 3 and USB 2 ports, 4GB of memory and a 500GB hard disk.

Some what bizarrely the unit originally shipped with FreeDOS as its operating system but the seller on this one had done me a favour and had pre installed what I was already after, Ubuntu.

Now I’ve courted Ubuntu on and off over the years and have had dedicated laptop drives installed with the OS which I’ve had to physically swap out when I’ve wanted to play, dual boot systems, you name it. Enough of that shash, this is a pure bred Ubuntu machine.

But it’s different to Windows I hear you cry! Yes it is only as much that the graphical front end looks a little different. So have all the versions of Windows that have existed.

Screenshot from 2016-04-17 16:17:16

Here’s a screenshot of my current desktop. The launch bar / dock is on the left. You can change that. Look down the launch bar. Oh yes! Firefox, Chrome, Thunderbird, Open Office, VLC, Dropbox

Sound familiar? Where do you think these oh so familiar packages on your Windows machine originated from?

Ah but if doesn’t run Microsoft Office or Photoshop. “Au contraire Blackadder!” I put it to you that Open Office and Gimp do it far better than a product on a Microsoft machine and for the grand total of nil of your hard earned pounds. Equally, did I mention that Ubuntu is free, where as Microsoft want to take you far well over £100 for a home copy of their OS’s.

Think about what you do with a computer. You shop online, you read your email, you write letters, you run spreadsheets and you interact more and more with online services which are OS independent as they are being delivered to you without a need for a prescriptive architecture to use them.

As such, does it matter what you do that on?

For me, playing radio there is a whole host of amateur radio tools lurking around in the Ubuntu package ether. My main weapon of choice for digital mode work, Fldigi also originated here.

With the current chaos and carnage my server failure is descending into, it’s useful to have a machine that is running the same OS in front of me to test bed various packages and options before I go anywhere near my server with them.

Am I happy? Yep

Will I be staying here for a while? Yep

Will I ditch my Windows machine for good? Nope, I have to admit there are some things you may still need a Windows machine for in the short term.

It’s just nice to have options! Have a think.


Beware snake oil salesmen!

I’m sure over the years James Cameron has made billions from his highly successful Terminator series of films and as I’ve sat there enjoying the robotic acting of the Governor of California, the plot line has evolved with the advancement of technology. If you’ve seen the latest installment, Terminator Genysis, the idea of self aware AI networks is matched very well to the current advancements in technology and social circumstances to the point that with a little bit of latitude you could start thinking “Hmm!” Lets face it self piloting vehicles are here. The UK is opening its roads to tests of driverless vehicles!

The only thing where the script writers have really got it wrong is with all this shash about having to defeat Skynet by sending naked muscle bound gladiators back through time to prevent the death of the hero’s mother in a form of retroactive abortion. The more realistic script would involve a team of commandos breaking into a computer facility, inserting a USB thumb drive in a free port, double clicking on the .exe file and then saying OK to “Do you wish to Upgrade to Windows 10?”

Oh yes! That’s guaranteed to ruin your day!

Cautionary tale to anyone out there with older tech which is being bombarded by the hard sale bubble in the taskbar saying “Your free copy of Windows 10 is available”

Just because that little Microsoft Snake Oil Salesman says you can have a copy of Windows 10 for nothing, doesn’t mean to say it will actually work!

Case in point, my netbook Terminator equivalent, the Panasonic TOUGHBOOK. I’ve been plagued by that damn bubble for months and have been ignoring it until the other day when I foolishly accepted the offer of the opportunity to destroy a perfectly functioning machine! TOUGBOOK CF-19’s are as hard as nails and do what they do very well within the confines of Windows 7 x64 and that’s where their rule of iron ceases. There are a lot of drivers required for the embedded hardware and without them you’re left with only half a machine. There are no Windows 10 drivers out there as it’s old tech so no one is backporting.

All that brief flirtation with that dialogue box has achieved is an awful lot of time wasting trying to undo my stupidity, which has now left me with a machine at the point of having cloned the hard drive across to the new SSD I installed shortly after purchase. Back ups or no back ups it’s been painful.

In summary “Your free copy of Windows 10 is available” translates to, your copy of Windows 10 is here but if you want it, buy a new a new machine and then pay the additional £100 plus for a copy! Beware!

mdadm RAID5 array under Ubuntu – I’m positive technology conspires against you!

I’m sure things are programmed to know when you’re skint so their failure causes you even more grief than it should!

And on that encouraging note my server which has disks in a RAID 5 configuration decided to send me an email at 10pm last night to let me know one of the disks had failed!

RAID 5 gives you a degree of protection from failure by providing redundancy but with this being the second disk in that machine to die in the last 5 months there was no time for hanging around in case another pegged out! RAID 5 allows for one disk death, two is game over!

The below resources are useful guides on how to get things back working again.

Replacing a failed disk in a mdadm raid

Replacing a failing disk on a Linux Software RAID 5

HOWTO Replace a failing disk on Linux Software RAID-5 – Consultancy.EdVoncken – pdf copy of web page as above link is currently down

However, a week on and all of a sudden I was getting a FailSpare event error email from the server and the disk was being auto removed from the array. This was a James May moment (“Oh Cock!”) until it turned out to be my brand new Western Digital Red Drive which was throwing up the error! The James May moment escalated to a new level! That’s a real cause for concern.

After a considerable amount of internet reading  I installed smartmontools and ran some tests on the disks in the RAID array (over a SSH session through a VPN over 3G!) Not a single error!

A bit more reading offered a solution without real explanation as to what a FailSpare error was. The following forum is worth a read along with this one.

The solution to removing the error is basically to mark the disk as failed, remove the failed disk from the array, add it back and set it off rebuilding again.

# mdadm –manage /dev/md0 -f /dev/sdc
( make sure it has failed )
# mdadm –manage /dev/md0 -r /dev/sdc
( remove from the array )
# mdadm –manage /dev/md0 -a /dev/sdc
( add the device back to the array )
# mdadm –detail /dev/md0
( verify there are no faults and the array knows about the spare )

OK we have a solution but why has a perfectly good, brand spanking new disk done this? One suggestion is SATA cables. Those in the know have had perfectly good disks report errors when there’s nothing wrong with them, only to discover that a substandard cable is the root cause. Now you could argue why that cause is exhibiting symptoms now rather than x years ago when the machine was first built, but in the absence of any other solutions sourcing a few brand new cables or reputable origin and swapping them out seems a good idea.

There is also the possibility that my failed 3TB disk of last week has nothing wrong with it. Plugging it into a SATA port on a motherboard and having a look what smartmontools has to say about it under an Ubuntu Live disk may be an interesting few hours work.

In the meantime I’m trying to get smartmontools to run as a daemon and carry out some meaningful tests on the disks on a regular basis to give me some advanced warning of problems.

Right, almost two weeks on and it’s not a happy story. In short I’ve lost all the data on the RAID array and had to replace assorted pieces of hardware and start from scratch. The data loss is an annoyance rather than a “throwing yourself from a bridge” situation, but the amount of time and effort (thank you Mat for your help) that has gone into this is a major pisser.

I will gloss over the majority of this but it’s worth making some key notes as there are useful tools and tactics out there should anyone else suffer a similar problem. I’m sure at some point in my life I’ll find myself here again and having something to refer to is going to be a help!

The RAID failure was caused by a failing disk throwing up bad blocks PLUS a duff SATA cable and/or controller card. RAID5 will tolerate a disk failure, but it looks like the failing cable on a second drive caused it to believe two disks were failing. As such I was never getting out of that situation in one piece.

The method of attempted repair went like this –

stop the array ASAP –

sudo mdadm --stop /dev/md0

use smartmontools to carry out long tests on all disks in the machine

sudo smartctl -t long /dev/sda

this takes a long time on 3TB disks but it tells you everything you need to know!

View the necessary reports

sudo smartctl -l selftest /dev/sda

Now the rub came when only one disk was reporting errors in that diagnostic report, because in theory the other three are intact and the data stripe is across all of them allowing the replacement of one and the subsequent rebuilding of the dataset.

As such the anticipated next step is to restart the array, forcing mdadm to use the pre-existing disks with their data, but ignoring the crazy spare fail flags and the like as there is only one faulty  disk and we can swap that out once the array rebuilds.

So the way to do this is

mdadm --create /dev/md0 --level=5 --raid-devices=4 --chunk=64 /dev/sdb1 /dev/sdc1 /dev/sdd1 /dev/sde1 --assume-clean

having a read of http://www.linuxquestions.org/questions/linux-server-73/mdadm-re-added-disk-treated-as-spare-750739/ gives an explanation as to the root of this command.

The –assume-clean throws caution to the wind and creates the array regardless of the disk states.

Right the next trick is to run fsck on the filesystem to correct any bad blocks which we know we’ve got because smartmontools has told us so as a result of the long scan tests.

Now I’m not convinced that this didn’t add to the problems. If the RAID array is rebuilding, running something like fsck which is going to start moving blocks around, to me, seems like a good way to confuse the hell out of things but research prior to hitting Enter said otherwise.

sudo fsck.ext4 -y -s /dev/md0

the -y switch saves having to answer every question fsck throws up and -s is similar to the –assume-clean used in mdadm

Problems started when fsck started running out of memory running it’s check which seemed very very odd!

A lot of reading later and this isn’t an uncommon problem which people have resolved by creating swapfiles to expand the machine’s memory to cope.

dd if= /dev/zero of= /swapfile1 bs=1024 count=12582912
mkswap /swapfile1
swapon /swapfile1

The above creates a 12GB swapfile called swapfile1 which gives you an extra 12GB of memory.

Internet posts suggest 1GB of memory and/or swapfile per Terabyte of disk you’re trying to fix, however in the middle of the night fsck crashed out again complaining about insufficient memory. Fsck is not a quick process, especially on a 12TB array!

You can add as many swapfiles as you want to expand the physical memory of your machine in line with the capacity of the disk containing that file. The snag is fsck runs slower, but if you want your data back it’s got to be worth a shot. That however, was a shot in the dark! With almost 64GB of virtual memory from 4 swapfiles, fsck still didn’t want to play and during its runs more and more bad blocks were being reported.

There comes a point where the return on investment question is asked. If I’ve got so many bad blocks in this data set, how usable will it be? How do I know which files are corrupt until I try and access them? Will I be able to replace that data in x years time when I discover a corrupted file?

Tough questions with only one solution. Start again from scratch. So, with a certain degree of reluctance, after an awful lot of effort, it was back to square one.

I decided to wipe the entire server and install Ubuntu 16.04 LTS beta (full release due imminently) and set my disks in a RAID5 array using ZFS. ZFS is now implemented as standard in 16.04 which is a bonus! The duff disk was replaced with a brand new 3TB drive and we’re ready to go.

ZFS is set to perform a weekly scrub and smartmontools does it’s thing on a weekly basis checking every single disk and reporting back.

The learning points from this are that nothing is infallible, regardless of the level of redundancy a RAID array offers. If it’s valuable back it up regularly on a removable media format and lock it in a fire safe ready for Judgement Day!

I’m more pissed off with the fact I haven’t progressed my 1Watter build or managed to do anything else for the last 2 weeks!

Don’t ask me to pick your winning Lotto numbers!

Resources

https://help.ubuntu.com/community/Smartmontools

https://help.ubuntu.com/community/Installation/SoftwareRAID

http://www.linuxquestions.org/questions/linux-server-73/mdadm-re-added-disk-treated-as-spare-750739/

https://raid.wiki.kernel.org/index.php/RAID_setup

https://raid.wiki.kernel.org/index.php/RAID_Recovery

Replacing a failed disk in a mdadm RAID